On September 3, 1939, Great Britain and France declared war on Germany, which, two days earlier, had launched an offensive in Poland. This is the beginning of the Second World War. The Maginot line was immediately occupied by fortress troops to cover the mobilization and to counter any surprise attack from Germany.
However, despite some skirmishes, no fighting took place on the border until May 10, 1940, the date of the German offensive on Western Europe. Belgium, the Netherlands, Luxembourg and France were then attacked and gradually invaded.
The French and allied armies were quickly routed. The defence of the border with Germany finally became unnecessary on 13 June 1940, and the troops at intervals behind the Maginot line were ordered to evacuate to the Vosges, while the crews of the structures had to hold until 17 June to cover this withdrawal and then, on 15 June, the troops occupying the casemates at intervals.
On 16 June, however, when the crews had begun scuttling the structures, German troops were spotted on the rear. The Téting Fort fires at enemy elements approaching the village of Téting-sur-Nied. It is bombed back. It has to be said that it is no longer possible to evacuate the area and that we must hold on.
On June 18, 1940, a German officer accompanied by two soldiers arrived at the Laudrefang fort where Commander Denoix, in charge of the Faulquemont Fortified Sector, was stationed. Eyes bandaged, they are brought to the bottom of the structure. The German officer required the Commander to hand over the 5 works in the sector. The Commander categorically refused to receive any order from an enemy officer and informed him that the crews would defend themselves against any attack. The German officer informed him that the structures would be bombed the same day from 18:00.

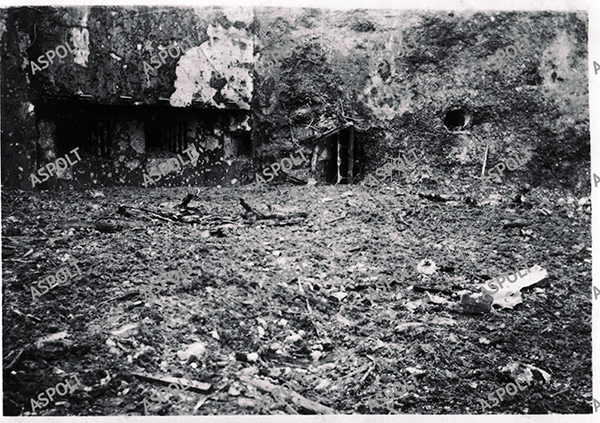
Indeed, from 18:00, the Laudrefang fort was bombed. Projectiles came from all sides, especially from the rear where the enemy had installed several guns on the ridge line. At the beginning of the fighting, in Block 2, Master Corporal Jean Gauer died as a result of a blow to one of the slots of the GFM bell in which he was stationed.
In Block 3, the situation is no better: “My turret fired automatic fire all night. This reassures the men and dissuades the opponent from prowling around my barbed wire. I spotted seven [German] guns in battery between Brandstuden’s farm and hill 400, they’ve already twisted a machine gun barrel and their shells are tearing off pieces of concrete twice the size of a head,” said Second Lieutenant Choné in a telephone conversation with Lieutenant Vincent at the structure’s headquarters. In addition, the firing bezel of the machine gun turret was destroyed by a blow to the goal and steel chips prevented the turret from slipping away completely.
At the end of the day on June 21, Choné counted “94 blows on the turret and bells in seven minutes”. Nevertheless, the firing chamber of the two 81mm mortars, just below, was intact and they thwarted several enemy attacks on the Téting combat block, 2km to the south.
Jean Vindevogel, an observer in the northern GFM bell, recounts the fighting in his book (now published and available for sale): “On our left flank compared to the attacker, the block of Téting, attacked by the enemy infantry, demands immediate help! In record time, Aspirant Turlot, Brigadier Braem and Pottier Calculator formed the firing elements for the two 81mm mortars. Already, Sergeant Hilaire has alerted the gun crews who occupy their battle stations around the mounts. Upstairs, the bombers fire bombs and place them in the norias, which automatically bring them back into the mortar chamber. The acoustic conduit that descends from the CP brings the order of relaxation and the deposit of the objective. Normal shot! Pointer ready. The breech closed on the first projectile which immediately left for a perfect trajectory of 3000m. It has been two minutes since the Teting threw its S.O.S.!… The two pieces each deliver 36 bombs at a fast rate. The attack is stopped in full force! At Téting, the crew must bless the artillerymen of Block 3! »
The Block 1 was also heavily pounded; its infantry firing chamber was almost destroyed and on June 22nd there was a German 88mm hit per minute. The day before, the two 81mm mortars of the Block routed the German soldiers who were attacking the Einseling Block despite the decommissioning of one of the two mortars on June 22, Block 1 prevented any further attacks on the Einseling block until the end.

Finally, on June 25, 1940 at 12:35 am, the Armistice came into force. France is defeated, Germany victorious. At the fortified fector of Faulquemont and elsewhere on the Maginot line, however, the crews still hold. The French flag flies over the structures.
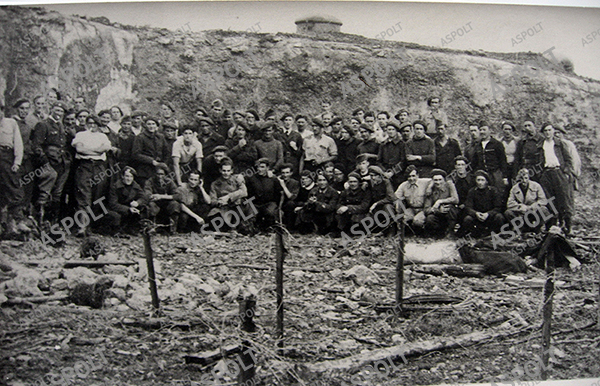
Thus, these fighters are relieved. On the morning of June 25, they leave the works. In Laudrefang, as in Téting and Einseling, they have not seen daylight for more than 8 days. They take advantage of the good weather, take out chairs and tables, and pick fruits and vegetables around the barbed wire networks. Life is back on track. Undefeated, they are now waiting to know when they can return home.

On July 2, 1940, however, it was a cold shower. The crews of the Fortified Sector of Faulquemont and the some 22,000 men still holding the Maginot line are indeed prisoners of war. This was one of the conditions required by the German General Staff when the Armistice was signed.
The French soldiers were then taken to prison camps in Germany, they did not return home until the liberation in 1945.
